Hello stranger, welcome to yet another OpenGL4 tutorial of mine! In this one, we will do a follow-up to the previous tutorial and we will extend heightmap by loading it from the image file instead of random terrain, so that you have full control over your terrain! Moreover, we will add another layer of realism to our scene by implementing skybox - a textured box around the world, that depicts skies and far-reaching surroundings! This one won't be very long to be honest, so read carefully through and you will learn something new today  .
.
In this tutorial, we are extending existing Heightmap class with a new static function called getHeightDataFromImage and a new constructor, that takes a filename and loads height data from image:
class Heightmap : public StaticMeshIndexed3D
{
public:
	Heightmap(const std::string& fileName, bool withPositions = true,
        bool withTextureCoordinates = true, bool withNormals = true);

	static std::vector> getHeightDataFromImage(const std::string& fileName);

    // rest remains same...
};
Let's examine that new functions getHeightDataFromImage. Let's have a look at the code first:
std::vector> Heightmap::getHeightDataFromImage(const std::string& fileName)
{
	stbi_set_flip_vertically_on_load(1);
	int width, height, bytesPerPixel;
	const auto imageData = stbi_load(fileName.c_str(), &width, &height, &bytesPerPixel, 0);
	if (imageData == nullptr)
	{
		// Return empty vector in case of failure
		std::cout << "Failed to load heightmap image " << fileName << "!" << std::endl;
		return std::vector>();
	}

	std::vector> result(height, std::vector(width));
	auto pixelPtr = &imageData[0];
	for (auto i = 0; i < height; i++)
	{
		for (auto j = 0; j < width; j++)
		{
			result[i][j] = float(*pixelPtr) / 255.0f;
			pixelPtr += bytesPerPixel;
		}
	}

	stbi_image_free(imageData);
	return result;
}
As you can see, it's pretty straightforward actually! All we have to do is to get the pointer to the raw data. If we can't load the image for whichever reason, we just return empty vector. Otherwise we simply iterate over all pixel using the raw pointer to data and we convert whichever byte value there is to float. Even if the image is saved as RGB or RGBA, I make assumption that this heightmap is really a grayscale image, thus it doesn't matter which color component I take out of it (grayscale has RGB components same), so I just take the first one (what pointer points to). At the end of the loop, the pointer is increased by number of bytes per pixel, which means we're jumping to the next pixel  .
.
This function is then used in constructor to construct heightmap from a given filename as follows:
Heightmap::Heightmap(const std::string& fileName, bool withPositions, bool withTextureCoordinates, bool withNormals)
	: StaticMeshIndexed3D(withPositions, withTextureCoordinates, withNormals)
{
	const auto heightData = getHeightDataFromImage(fileName);
	if (heightData.size() == 0) {
		return;
	}

	createFromHeightData(heightData);
}
Relatively simple stuff - we just check if the vector has some data in it and then we proceed with load the same way, as we did with randomly generated data  . Now let's discuss completely other thing - skybox.
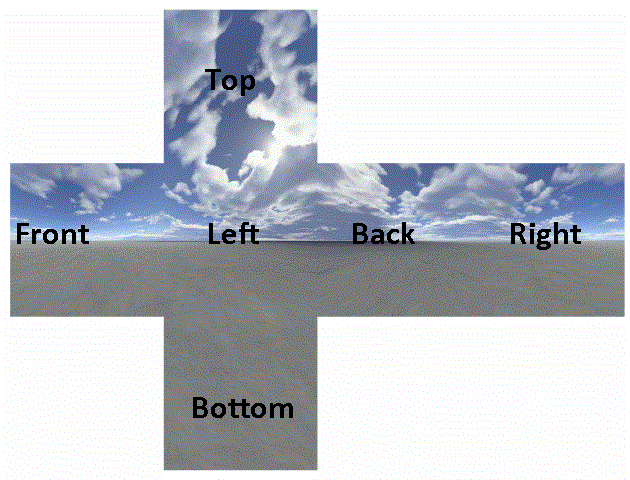
For those of you that don't know what a skybox is - it's nothing but a big box that is around our camera, moves with us everywhere and has some textures of surroundings (skies, mountains, but also whatever alien worlds you might imagine  ) mapped onto it. Actually, it does not even have to be big, just have some sufficient size (will explain later
  ). These textures are seamless, so you don't see any box edges or anything and the whole thing will look as one continuous sky. Let's have a look at single skybox, so that you have an idea what it looks like:

As you can see, skybox is just a textured cube and when we unfold its faces, we will get such a shape, as if we wanted to cut out a cube from the paper and then fold it. This idea is very simple, yet very powerful. We will create a separate class for skybox (static 3D mesh) to have everything we need in one place:
class Skybox : public Cube
{
public:
	static const std::string SAMPLER_KEY;

	Skybox(const std::string& baseDirectory, const std::string& imageExtension,
		bool withPositions = true, bool withTextureCoordinates = true, bool withNormals = true);
	~Skybox();

	void render(const glm::vec3& cameraPosition, ShaderProgram& shaderProgram) const;

private:
	std::string _baseDirectory;
	std::string _imageExtension;

	std::string getSideFileName(const int sideBit) const;
	std::string getTextureKey(const int sideBit) const;
	void tryLoadTexture(const int sideBit) const;
};
You might see that this class is inherited from Cube class, because skybox is really a box, a cube. I can just shortly explain what do these functions do. render of course renders the skybox with specific shader program centered around specific position (usually camera position). getSideFileName returns name of file for concrete side (front, back, left, right, top or bottom) and getTextureKey returns a key to store texture with for every side.
tryLoadTexture tries to load a texture for a given side. Why does it only try? Because some skyboxes you find around internet are sometimes missing some sides, usually bottom one, because this one is usually not visible (it's under terrain and you can't see it.). Unless there is a bug in game, like last time I played Doom (2016) and I just suddenly fell under the ground and died  (just happened only once though). So it actually looks if there is a file with such name and if yes, it loads a texture. This way, we try to load all 6 sides
  . Let's now examine render function, this one requires some tricks.
void Skybox::render(const glm::vec3& cameraPosition, ShaderProgram& shaderProgram) const
{
	// Get all texture keys
	const auto frontKey = getTextureKey(CUBE_FRONT_FACE);
	const auto backKey = getTextureKey(CUBE_BACK_FACE);
	const auto leftKey = getTextureKey(CUBE_LEFT_FACE);
	const auto rightKey = getTextureKey(CUBE_RIGHT_FACE);
	const auto topKey = getTextureKey(CUBE_TOP_FACE);
	const auto bottomKey = getTextureKey(CUBE_BOTTOM_FACE);
	auto& tm = TextureManager::getInstance();
	const auto& sampler = SamplerManager::getInstance().getSampler(SAMPLER_KEY);
	sampler.bind();

	// Turn off depth mask (don't write to depth buffer)
	glDepthMask(GL_FALSE);

	// Enlarge default cube by some factor, that's not further then far clipping plane (100 is fine)
	auto skyboxModelMatrix = glm::translate(glm::mat4(1.0f), cameraPosition);
	skyboxModelMatrix = glm::scale(skyboxModelMatrix, glm::vec3(100.0f, 100.0f, 100.0f));
	shaderProgram.setModelAndNormalMatrix(skyboxModelMatrix);

	// Render front side if texture has been loaded
	if (tm.containsTexture(frontKey))
	{
		tm.getTexture(frontKey).bind();
		renderFaces(CUBE_FRONT_FACE);
	}

	if (tm.containsTexture(backKey))
	{
		tm.getTexture(backKey).bind();
		renderFaces(CUBE_BACK_FACE);
	}

	if (tm.containsTexture(leftKey))
	{
		tm.getTexture(leftKey).bind();
		renderFaces(CUBE_LEFT_FACE);
	}

    if (tm.containsTexture(rightKey))
	{
		tm.getTexture(rightKey).bind();
		renderFaces(CUBE_RIGHT_FACE);
	}

	if (tm.containsTexture(topKey))
	{
		tm.getTexture(topKey).bind();
		renderFaces(CUBE_TOP_FACE);
	}

	if (tm.containsTexture(bottomKey))
	{
		tm.getTexture(bottomKey).bind();
		renderFaces(CUBE_BOTTOM_FACE);
	}

	glDepthMask(GL_TRUE);
}
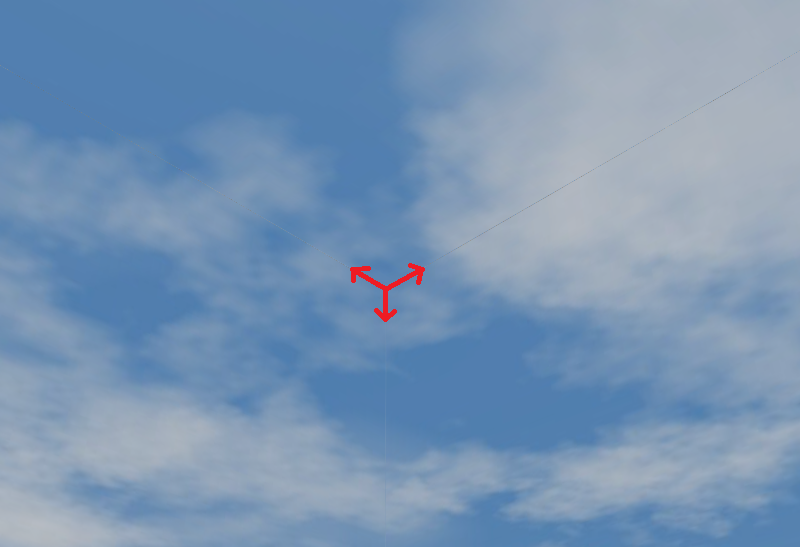
All we have to do is to render all 6 sides separately, with different textures. But there are two most important things to notice. First one is a sampler that we use. I use trilinear filtering here, but important thing is that sampler clamps the texture to the edge! This is actually done in constructor of Skybox class, you can have a look at it, there is a method called setRepeat(false). Without using such a sampler, we would see the edges of the box:

With this trick, the sky is seamless, you don't notice any edges at all  !
!
Second thing is to turn writing to depth mask off. Again, it's a very similar thing as with transparent objects. Basically we want the skybox to be our background and that's what we achieve by turning writing to depth buffer off! The skybox is rendered, but it's considered to be far away. Again, without using this, your skybox would block other renderings. Depending on its size, you would see as much world as skybox around you allows you to. I recommend to try it yourself too  . I chose size 100.0f, because that is more than enough. Interestingly, any reasonable size works (even just 2.0f!), because important thing here is that box is far enough from the near clipping plane and not beyond far clipping plane. Again - try to play with this size value, set it to 1, 2, even 2000 and observe the results for yourself
  . But one hundred is like a reasonable value for me.
At the end of rendering, don't forget to turn depth mask on again, so that objects rendered later are normally depth compared  . The way skybox is rendered is in renderScene and there is really nothing special - we render it around camera, so that skybox travels around us always. Moreover, we omit diffuse lightning calculations for skybox completely (we set the diffuse light to one that has no contribution and no factor) and only ambient gets applied. And that's all I have to say, it's really nothing less nothing more, pretty simple!
This is what has been achieved today...

... and I think it's pretty nice  . Not only we have control over how our terrain looks now, but we also can render surroundings - skies and mountains with minimal effort! As always, I hope you have enjoyed this tutorial yet again and I hope you will also read my other tutorials!
 Download 10.19 MB (1040 downloads)